2022. 12. 11. 01:08ㆍProject/시네마그램
이전 포스팅에서 세션을 생성하고 세션을 사용하기 전 어디에 있는지 확인하는 절차까지 하였습니다.
이번 포스팅에서는 세션을 사용하여 회원정보 변경을 해보겠습니다. (user/update)
회원정보 변경 버튼 클릭 시 나오는 화면입니다. input 정보는 update.html valule에 적어둔 내용입니다.
우리는 우선 input태그에 세션 정보가 나오면 됩니다.

말로 먼저 말씀드리고 실습 코드로 넘어가겠습니다.
- 세션 정보가 어디있나?
- UserController customUserDetails에 있습니다.
- 그럼 이 세션 정보를 어떻게 user/update.html에 넘길 수 있나?
- Model에 담아서 넘길 수 있습니다.
코드로 살펴보겠습니다.
UserController
@Controller
public class UserController {

    @GetMapping("/user/{id}/update")
    public String update(@PathVariable int id, @AuthenticationPrincipal CustomUserDetails customUserDetails, Model model) {
        model.addAttribute("sessionUser", customUserDetails.getUser());

        return "user/update";
    }
}
update.html
회원 정보가 들어있는 form태크는 section태크 안에 있습니다.
model에서 넘겨준 sessionUser를 사용하기 위해서는 선작업으로 section태그 안에 th:object="${sessionUser}"
넣어주어야 합니다. (타임리프 - 변수 표현식 사용)
<section class="setting-container" th:object="${sessionUser}">
저 코드를 통해서 sessionUser안의 User정보들에 접근할 수 있습니다.
그럼 나머지 input 태그에 th:field="*{ }" 코드를 추가하면 원하는 필드 정보에 접근 할 수 있습니다.
th:field="*{User오브젝트의 필드명}"
타임리프 문법에 관해서 자주 쓰이는 것들 위주로 포스팅하였습니다.
혹시 이해가 안 가시는 부분이 있다면 참고하시면 좋을 것 같습니다.
여기까지 해서 세션 정보를 가져왔으니, 수정을 하고 DB 저장하는 일이 남았습니다.
우선 수정을 하기 위해서는 PUT을 사용해야 합니다.
PUT vs PATCH
두 method 모두 서버의 리소스를 수정한다는 점에서 비슷하지만 큰 차이가 있습니다.
PUT은 모든 리소스,
PATCH는 일부 리소스를 수정합니다.
th:onsubmit 을 form태그에 추가하여 제출 버튼 클릭 시 연결된 update.js의 update()에 연결해보겠습니다.
<form id="profileUpdate" th:onsubmit="'update(' + ${sessionUser.id} + ',event);'">update.js
function update(sessionId, event) {
    alert("update 제출 버튼 클릭")
}
update() 코드입니다.
function update(sessionId, event) {

        event.preventDefault();

        let data = $("#profileUpdate").serialize(); // key = value 형태로 받아옴

        $.ajax({
            type: "PUT",
            url: `/api/user/${sessionId}`,
            data: data,
            contentType: "application/x-www-form-urlencoded; charset=utf-8",
            dataType: "json",
            success: function(status) {
                location.href=`/user/${sessionId}`;
            },
            error: function(error, status) {
                if(error.responseJSON.data == null) {
                    alert(error.responseJSON.message);
                } else {
                    alert(JSON.stringify(error.responseJSON.data)); // errors에 있는 data
                }
            }
        });
}
1. form태그 안의 모든 정보가 필요하므로 sessionId를 받습니다.
2. 같이 넘겨준 event와 event.preventDefault()를 추가 한 이유는 뭘까요?
form태그 안에 input 등의 전송을 하는 동작을 중지시켜서 다음 페이지로 가는 것을 막아주는 역할을 합니다.
우리 프로젝트를 예로 들면 form태그 안에 있는 submit버튼을 클릭하게 되면 액션이 일어납니다. 어딘가로 이동해야 하는데 해당 코드는 생략되어 있죠, 그럼 default로 자기 자신으로 돌아오게 됩니다. 우리의 의도는 그게 아닌 update함수로 넘어가서 진행되어야 하므로 이를 막아야 합니다. 이 역할을 해주는 녀석이 event.preventDefault()인 것입니다.
3. alert()만 하게 되면 Object라고 경고창을 띄웁니다. JSON.stringify를 추가 함으로써 JS object를 JSON문자열로 변환시키는 코드를 추가하였습니다.
JS에서 Ajax를 활용하여 API 구현
해당 메서드에서 Ajax 요청 시 응답을 페이지가 아닌 데이터로 받기 위해서 API용 Controller를 생성합니다.
(@RestController)
Ajax : 자바스크립트를 통해 서버에 데이터를 요청하는 코드
API : 서버와 클라이언트 간의 통신 메커니즘으로 클라이언트가 서버에 데이터를 달라고 요청하거나 사용자로부터 입력된 새로운 데이터를 서버에 전송하여 데이터베이스에 저장하는 등의 작업을 요청하는 통신 방법
API를 만들기 위해 총 3개의 클래스가 필요합니다.
- Request 데이터를 받을 DTO : UserUpdateDto
- API 요청을 받을 Controller : UserApiController
- 트랜잭션과 비즈니스 로직을 처리하는 Service : UserService
오브젝트를 넘길 때 엔티티가 아닌 API스펙에 맞는 DTO를 사용해야 합니다.
UserUpdateDto
@Data
public class UserUpdateDto {
    private String name;
    private String password;
    private String website;
    private String bio;
    private String phone;
    private String gender;

    public User toEntity() {
        return User.builder()
                .name(name)
                .password(password)
                .website(website)
                .bio(bio)
                .phone(phone)
                .gender(gender)
                .build();
    }

}
❗ 추가적으로 고려할 부분
다른 필드와 달리 name, password는 필수로 입력이 들어가야 합니다. 따라서 Validation체크가 들어가야합니다.
그럼 UserApiController에서 해당 DTO를 사용해서 수정한 데이터들이 잘 넘어오는지 확인해보겠습니다.
@RestController
public class UserApiController {

    @PutMapping("/api/user/{id}")
    public String update(UserUpdateDto userUpdateDto) {
        System.out.println("userUpdateDto: " + userUpdateDto);
        return "확인중";
    }
}
콘솔
userUpdateDto: UserUpdateDto(name=이름은수정사과, password=1234, website=수정수정@nate.co., bio=, phone=010-5555-4444, gender=중성)
다행히 잘 넘어오고 있습니다. 이제 이 데이터를 DB에 Update만 하면 됩니다.
이러한 비즈니스 로직을 담을 Service가 필요한데, UserService의 userUpdate()에서 처리해야 할 것은 무엇일까요?
우선 JPA가 관리하기 위해서 영속화를 시켜야 합니다. 그러면 영속화된 오브젝트를 변경 시 변동된 정보가 자동으로 DB에 반영되게 됩니다. 이를 더티체킹이라 합니다.
UserService
@RequiredArgsConstructor
@Service
public class UserService {

    private final UserRepository userRepository;
    private final BCryptPasswordEncoder bCryptPasswordEncoder; // 비밀번호 암호화

    @Transactional
    public User userUpdate(int id, User userUpdateDto){
        User userEntity = userRepository.findById(id)
                .orElseThrow(() -> new IllegalArgumentException("해당 유저가 없습니다. id: " + id));

        userEntity.setName(userUpdateDto.getName());

        String rawPassword = userUpdateDto.getPassword();
        String encPassword = bCryptPasswordEncoder.encode(rawPassword);

        userEntity.setPassword(encPassword);
        userEntity.setWebsite(userUpdateDto.getWebsite());
        userEntity.setBio(userUpdateDto.getBio());
        userEntity.setPhone(userUpdateDto.getPhone());
        userEntity.setGender(userUpdateDto.getGender());
        return userEntity;
    }

}
1. 영속화
서버에서 .findById(id)를 통해 DB에 있는 user정보를 찾으면,
영속성 콘텍스트 안에 찾은 객체를 넣습니다.
2. 영속화된 오브젝트를 변경하면 변동된 정보가 자동으로 DB에 반영이 됩니다.
❓❗ 추후 리팩토링 하고 싶은 부분
.set을 이용해서 update을 했습니다.
1. setter를 쓰면 안 됨. 그런데 왜 쓰게 되었나?
2. User오브젝트, userUpdateDto 클래스 레벨에 @Data를 붙여서 생긴 문제점으로 파악됨
이 부분을 User엔티티에 update용 생성자를 추가로 만들어서 userUpdateDto.get을 통해 수정하는 것으로 바꿀 것입니다.
추가적으로 고려할 부분이 있습니다. 변경된 부분을 세션에도 update를 해주어야 합니다.
UserApiController
@PutMapping("/api/user/{id}")
public ResDto<?> update(@PathVariable int id, UserUpdateDto userUpdateDto, @AuthenticationPrincipal CustomUserDetails customUserDetails) {
    User userEntity = userService.userUpdate(id, userUpdateDto.toEntity());
    customUserDetails.setUser(userEntity); // 세션정보 변경을 위한 처리
    return new ResDto<>(1,"회원 수정 완료", userEntity);
}
위에서 잠깐 언급한 것처럼 name, password은 필수 값이므로 꼭 받아야 합니다. 따라서 사용자가 해당 부분을 기입하지 않았다면 서버 앞 뿐만 아니라 뒷단에서도 막아주어야 합니다.
0. 프론드 단에서 막기
1. Validation 유효성 검사 & ExceptionHanlder 예외처리
2. 회원가입하지 않은 사용자 걸러내기 (ExceptionHanlder 예외처리)
0. 프론트 단에서 막기
update.html
name과 password의 해당 input태크 안에 해당 코드를 추가합니다.
required="required"
둘 중에 한 필드를 공백으로 두었을 때 다음 페이지로 넘어가지 않고 경고창이 뜨게 됩니다.
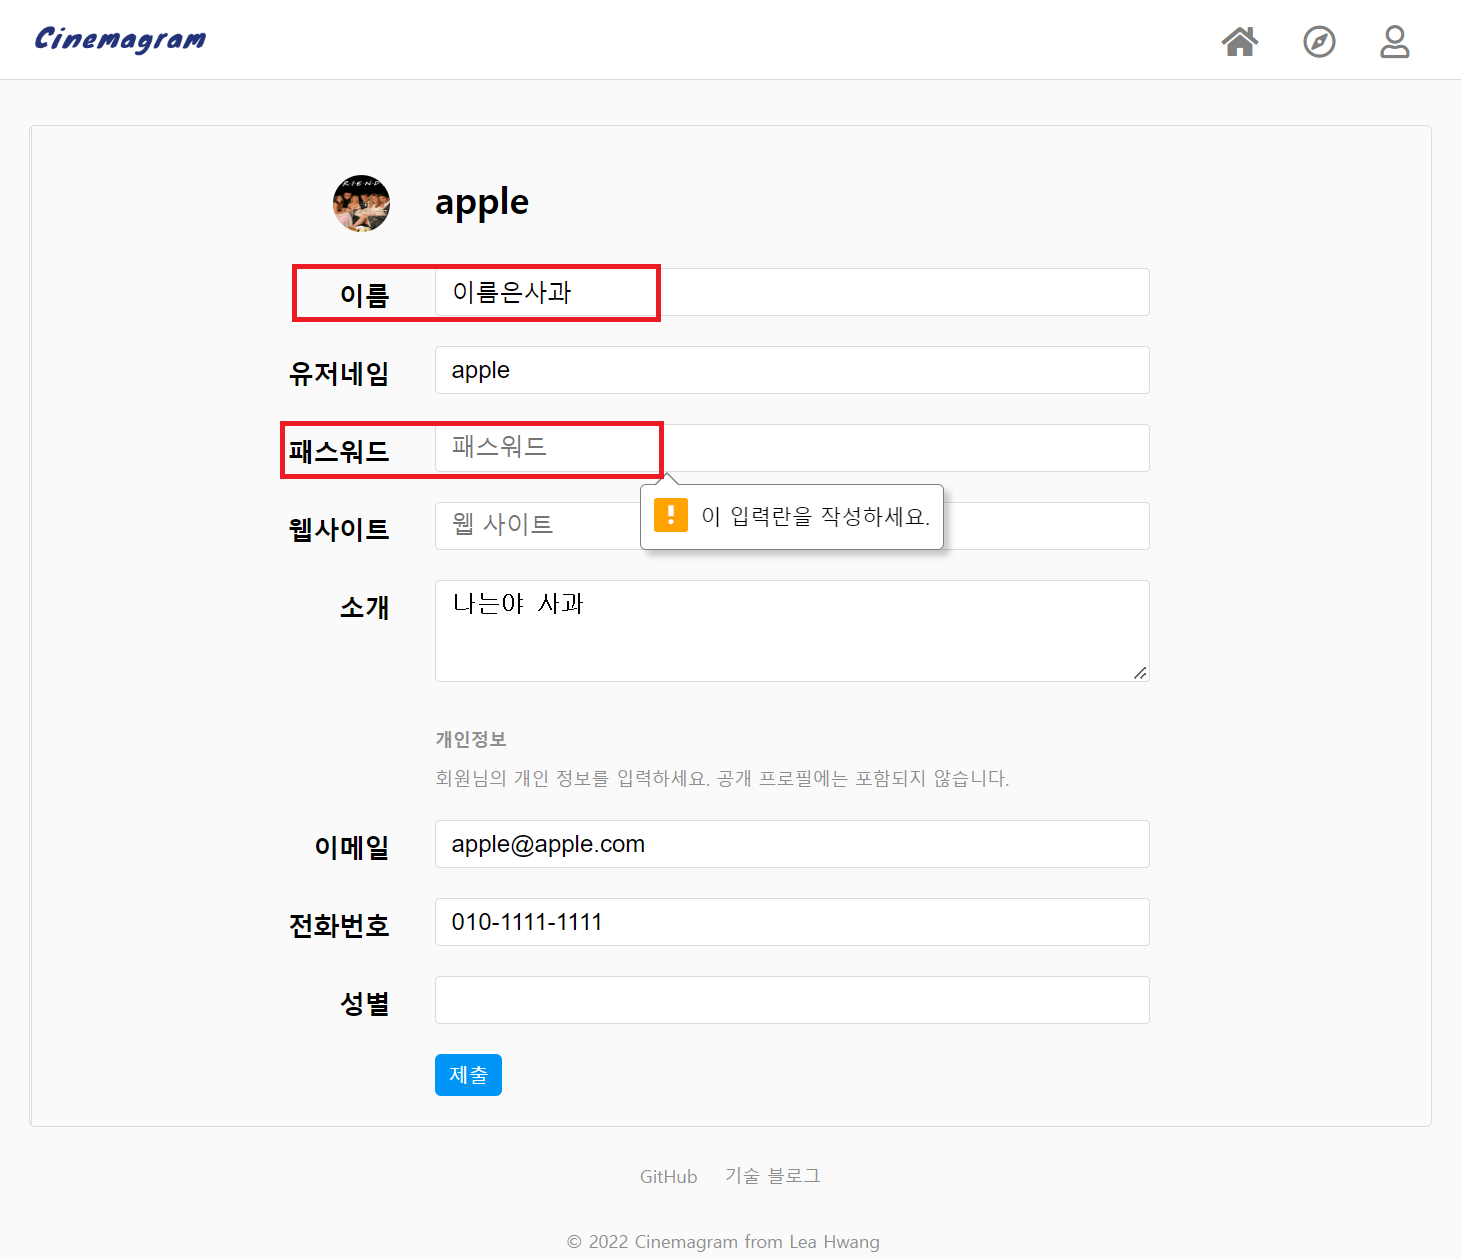
하지만 이제 우리는 압니다, Postman 등을 이용하면 프런트 단에서 막은 건 소용이 없다는 것을요.
따라서 Validation 유효성 검사를 추가로 해주어야 합니다.
1. Validation 유효성 검사
순서를 잘 기억해주세요.(스스로에게 하는 말입니다. 제발 기억해줘..)
- UserUpdateDto
- name, password필드에 Validation 어노테이션을 붙입니다.
- UserApiController
- 유효성 검사하고자 하는 클래스에 @Valid 어노테이션 추가
- 바로 옆 파라미터에 BindingResult 추가
- BindingResult에 hasError가 있다면 CustomValidationApiException 발동시킴
- CustomValidationApiException
- ControllerExceptionHandler
그리고 이 단계를 확인하기 위해서는 update.html에 적어두었던 required="required"는 잠시 지워주시고 하셔야 합니다.
UserUpdateDto
@NotBlank
private String name;
@NotBlank
private String password;
UserApiController
@PutMapping("/api/user/{id}")
public ResDto<?> update(@PathVariable int id,
                        @Valid UserUpdateDto userUpdateDto, BindingResult bindingResult,
                        @AuthenticationPrincipal CustomUserDetails customUserDetails) {
    if(bindingResult.hasErrors()) {
        Map<String,String> errors = new HashMap<>();

        for(FieldError error : bindingResult.getFieldErrors()) {
            errors.put(error.getField(),error.getDefaultMessage());
        }
        throw new CustomValidationApiException("유효성 검사에 실패하였습니다.", errors);
    }else {
        User userEntity = userService.userUpdate(id, userUpdateDto.toEntity());
        customUserDetails.setUser(userEntity);
        return new ResDto<>(1,"회원 수정 완료", userEntity);
    }
}
CustomValidationApiException
직접 만든 + 유효성 검사 관련 + API통신 시 데이터를 응답하는 + Exception
@Data
@AllArgsConstructor
@NoArgsConstructor
public class CustomValidationApiException extends RuntimeException {
    private static final long serialVersionUID = 1L;

    private String message;
    private Map<String, String> errors;
}
Ajax 통신으로 응답을 보낼 때는 HTTP상태 코드를 같이 보내주는 것을 권장합니다.
따라서 우리가 지금까지 이용한 ResDto는 상태코드를 던져주는 필드가 없으므로 ResponseEntity<T>를 이용해보겠습니다.
Body, Status 순서로 넣습니다.

이제는 브라우저에서 name, password를 입력하지 않고 제출 요청을 했을 때 어떻게 막는지 살펴보겠습니다.

제가 의도했던 대로 alert창을 띄워주며 다음 페이지로 넘어가지 않고 있습니다.
이번에는 약간 다른 상황입니다. 회원 가입을 하지 않은 사용자가 회원정보를 수정하려고 시도했을 경우 막는 단계입니다.
2. ExceptionHanlder 예외처리
UserService
@Transactional
public User userUpdate(int id, User userUpdateDto){
    User userEntity = userRepository.findById(100)
            .orElseThrow(() -> new IllegalArgumentException("해당 유저가 없습니다. id: " + id));
            ...
}
java.lang.IllegalArgumentException: 해당 유저가 없습니다. id: 2
를 출력하며 서버가 터집니다.
API 요청은 공통으로 처리하는 게 좋으므로 미리 만들어두었던 CustomValidationApiException을 활용해서 ControllerExceptionHanlder에서 처리하도록 수정해보겠습니다.
CustomValidationApiException에 생성자를 추가로 만듦
@Data
@NoArgsConstructor
public class CustomValidationApiException extends RuntimeException {
    private static final long serialVersionUID = 1L;

    private String message;
    private Map<String, String> errors;

    public CustomValidationApiException(String message) {
        super(message);
    }

    public CustomValidationApiException(String message, Map<String, String> errors) {
        super(message);
        this.errors = errors;
    }

}
ControllerExceptionHandler
@RestController
@ControllerAdvice
public class ControllerExceptionHandler {

    @ExceptionHandler(CustomValidationApiException.class)
    public ResponseEntity<?> validationApiException(CustomValidationApiException e){
        return new ResponseEntity<>(new ResDto<>(-1,e.getMessage(),e.getErrors()), HttpStatus.BAD_REQUEST);
    }
}
이제 CustomValidationApiException이 터지면 ControllerExceptionHanlder가 낚아채서 ResponseEntity를 응답해줍니다.
브라우저로 확인했을 시,
제출 버튼을 누르면 경고창 메시지로 null이 뜨는 것을 확인할 수있습니다. 원인은 오버로딩 때 message 값을 세팅 안 해서 생긴 문제 였고 코드를 수정하였습니다.
문제 해결은 [Trouble Shooting] ExceptionHanlder 예외처리를 통한 원하는 메세지 출력 따로 빼서 기재하였습니다.
(중간에 문제 해결 부분을 계속 넣으면 흐름이 깨질 것 같기에 앞으로도 따로 처리할 예정입니다.)


여기까지 세션을 활용한 회원 정보 수정과 필수 값을 입력하지 않았을 시 대처법 그리고 유저가 아닌 사용자가 회원 정보를 수정하려고 할 시 어떻게 내보낼 수 있는지까지 알아보았습니다.
회원 정보 수정과 필수 값 유효성 검사 및 예외처리로 push 하였습니다.
다음 포스팅에서는 팔로우 하는 부분을 구현할 예정입니다.
'Project > 시네마그램' 카테고리의 다른 글
| [Cinemagram] JPA Native Query 팔로우 구현 및 예외처리 - (6) (0) | 2022.12.11 |
|---|---|
| [Refactoring] Spring Data JPA Auditing - 시간 한 곳에서 관리 (0) | 2022.12.11 |
| [Trouble Shooting] ExceptionHanlder 예외처리를 통한 원하는 메세지 출력 (0) | 2022.12.11 |
| [Cinemagram] 로그인(Spring Security - session 생성) - (4) (0) | 2022.12.07 |
| [Cinemagram] 회원가입 유효성 검사(Validation)와 예외처리(ExceptionHandler, @ControllerAdvice) 적용 - (3) (0) | 2022.11.15 |